Geek Lands: productivity

A fresh blog on latest technology and programming trends for the Geeks by a Geek.

Recent Posts

Showing posts with label productivity. Show all posts

Wednesday, August 23, 2017

Let's build a Real-Time Markdown Editor with Node.js

August 23, 2017 0
Let's build a Real-Time Markdown Editor with Node.js


Intro

Markdown is a very popular text format written in an easy-to-read way and is convertible to HTML. It is a markup format that has been popularized by sites such as Github and Stack Overflow. Today we will be building an app that let's us view the raw markdown on the left side and the converted markdown (to HTML) on the right side. We will also allow multiple people to work on the same markdown document at the same time via a shareable URL and all changes will be saved for real time collaboration efforts!

Setup Node

Let's get started on our real time markdown viewer app. We will be using our backend in Node for this application. First we need to create a project directory and then from the command line execute the following command assuimg Node.js is already installed in the system:
 
npm init
This will prompt us with several questions. You can fill in the prompts accordingly. This will create a package.json file. Here is my sample package.json file.
{
 "name": "RealtimeMarkdownViewer",
 "description": "Realtime Markdown Viewer",
 "main": "server.js",
 "version": "1.0.0",
 "repository": {
 "type": "git",
 "url": ""
 },
 "keywords": [
 "markdown",
 "realtime",
 "sharejs"
 ],
 "author": "SrvZ",
 "dependencies": {
 "express": "^4.12.4",
 "ejs": "^2.3.1",
 "redis": "^0.10.3",
 "share": "0.6.3"
 },
 "engines": {
 "node": "0.10.x",
 "npm": "1.3.x"
 }
 }
Now let's create a server.js file in our root directory. This will be the main server file. We will be using Express as our web application framework. Using Express makes building a server simpler. With Express we will be using EJS for our view templates. To install Express and EJS run the following commands:

node install --save express
node install --save ejs
 
Also create a views folder and a public folder in the root directory.. The views folder is where we will be putting our EJS templates and the public folder is where will be serving our assets (stylesheets, javascript files, images). Now, we are ready to add some code to our server.js file.
// server.js
var express = require('express');
var app = express();
// set the view engine to ejs
app.set('view engine', 'ejs');
// public folder to store assets
app.use(express.static(__dirname + '/public'));
// routes for app
app.get('/', function(req, res) {
 res.render('pad');
});
// listen on port 8000 (for localhost) or the port defined for heroku
var port = process.env.PORT || 8000;
app.listen(port);
Here we require the Express module, set the rendering engine to EJS, and we have a route for our home page. We also set the public directory to be a static directory. Lastly we set the server to listen on port 8000. From our home route, we will be rendering a file called pad.ejs from the view directory. This is a sample views/pad.ejs file.

html
head
 titleRealtime Markdown Viewer/title
 link href="https://maxcdn.bootstrapcdn.com/bootstrap/3.3.4/css/bootstrap.min.css" rel="stylesheet"
/head
body class="container-fluid"
Hello World!
/body
/html
For styling, we added Bootstrap. Let's start up our node server (node server.js) and go http://localhost:8000 in our web browser. You should see something like this:
image1

Setup View, CSS, and JS Files

We don't want our view file to just say "Hello World!", so let's edit it. We want a text area on the left side where the user can add markdown text and we want an area on the right side where the user can see converted into HTML markdown. If a user edits the text area, we want the markdown area to updated automatically. Stylistically, we want both our textarea and converted markdown area to be 100% height.
To convert text to HTML, we will be using a library called Showdown. Let's review our updated view file.

html
head
 titleRealtime Markdown Viewer/title
 link href="https://maxcdn.bootstrapcdn.com/bootstrap/3.3.4/css/bootstrap.min.css" rel="stylesheet"
 link href="style.css" rel="stylesheet"
/head
body class="container-fluid"
 section class="row"
 textarea class="col-md-6 full-height" id="pad"Write your text here../textarea
 div class="col-md-6 full-height" id="markdown"/div
 /section
 script src="https://cdn.rawgit.com/showdownjs/showdown/1.0.2/dist/showdown.min.js"/script
 script src="script.js"/script
/body
/html
In the view file, we added links to a CSS and a JS file. We also added the textarea (where we write the markdown) and markdown area (where we view the markdown). Notice that they have specific ID's — this will be useful for our javascript. Let's add some style now to public/style.css.
/* public/style.css */
html, body, section, .full-height {
 height: 100%;
}
#pad{
 font-family: Menlo,Monaco,Consolas,"Courier New",monospace;
 border: none;
 overflow: auto;
 outline: none;
 resize: none;
 -webkit-box-shadow: none;
 -moz-box-shadow: none;
 box-shadow: none;
}
#markdown {
 overflow: auto;
 border-left: 1px solid black;
}
For our javascript file (public/script.js) we want to create a function that can convert the textarea text, convert this HTML, and place this HTML in our markdown area. We also want an event listener, which for any input change of the text area (keydown, cut, paste, etc...) it will run this converter function. Finally, we want this function to run initially on page load. Here is our public/script.js file.
/* public/script.js */
window.onload = function() {
 var converter = new showdown.Converter();
 var pad = document.getElementById('pad');
 var markdownArea = document.getElementById('markdown');
 var convertTextAreaToMarkdown = function(){
 var markdownText = pad.value;
 html = converter.makeHtml(markdownText);
 markdownArea.innerHTML = html;
 };
 pad.addEventListener('input', convertTextAreaToMarkdown);
 convertTextAreaToMarkdown();
};
At this point we should have a functional app that will let us edit and view markdown right away. If we go to the homepage and add some sample markdown, we should see something like this:
image2

Add ShareJS to Backend

Although we have a working prototype where a user can work on a markdown document, we have to add the feature where multiple people can work on single markdown document. At this point, if multiple users go the home page, they can each work on their own markdown document and each change they make will only be viewable to them. Also if they end up refreshing the page, all their work will be lost. Therefore, we need to add a way for multiple users to edit the same markdown document and we also need a way to save changes.
As soon a user types on a page, we want this change to be reflected for all users. We want this markdown app to be a real time updating app. Basically we are trying to add a "Google Document" type functionality where changes are seen automatically. This is not an easy problem to solve, however, there is a library that does the heavy lifting for us. ShareJS is a library that implements real time communication. ShareJS has one dependency though — it requires Redis. Redis is a fast data store and that is where we will be storing our markdown files. To download and install Redis, we can follow the Redis documentation. Once we install Redis, we need to add the node modules for sharejs and redis, and then we should restart Node. ShareJS allows us to save the markdown document as soon as any user make a change to it.

npm install --save share@0.6.3
npm install --save redis

First let's add the ShareJS code to our server file.

/* server.js */
var express = require('express');
var app = express();
// set the view engine to ejs
app.set('view engine', 'ejs');
// public folder to store assets
app.use(express.static(__dirname + '/public'));
// routes for app
app.get('/', function(req, res) {
 res.render('pad');
});
app.get('/(:id)', function(req, res) {
 res.render('pad');
});
// get sharejs dependencies
var sharejs = require('share');
require('redis');
// options for sharejs 
var options = {
 db: {type: 'redis'},
};
// attach the express server to sharejs
sharejs.server.attach(app, options);
// listen on port 8000 (for localhost) or the port defined for heroku
var port = process.env.PORT || 8000;
app.listen(port);

We require ShareJS and Redis, and set some options for it. We force ShareJS to use Redis as its data store. Then, we attach our Express server to our ShareJS object. Now we need to add links to some "ShareJS" frontend javascript files in our view file.

html
head
 titleRealtime Markdown Viewer/title
 link href="https://maxcdn.bootstrapcdn.com/bootstrap/3.3.4/css/bootstrap.min.css" rel="stylesheet"
 link href="style.css" rel="stylesheet"
/head
body class="container-fluid"
 section class="row"
 textarea class="col-md-6 full-height" id="pad"Write markdown text here../textarea
 div class="col-md-6 full-height" id="markdown"/div
 /section
 script src="https://cdn.rawgit.com/showdownjs/showdown/1.0.2/dist/showdown.min.js"/script
 script src="/channel/bcsocket.js"/script
 script src="/share/share.uncompressed.js"/script
 script src="/share/textarea.js"/script
 script src="script.js"/script
/body
/html
The files we require are for creating a socket connection to our backend (bcsocket.js) and sending and receiving textarea events (share.uncompressed.js and textarea.js). Finally, we need to actually add the code that implements ShareJS in our frontend javascript file (public/script.js).

/* public/script.js */
window.onload = function() {
 var converter = new showdown.Converter();
 var pad = document.getElementById('pad');
 var markdownArea = document.getElementById('markdown');
 var convertTextAreaToMarkdown = function(){
 var markdownText = pad.value;
 html = converter.makeHtml(markdownText);
 markdownArea.innerHTML = html;
 };
 pad.addEventListener('input', convertTextAreaToMarkdown);
 sharejs.open('home', 'text', function(error, doc) {
 doc.attach_textarea(pad);
 });
};
At the very bottom of this file, we open up a sharejs connection to "home" (because we are on the home page). We then attach the textarea to the object returned by this connection. This code keeps our textarea in sync with everyone else's textarea. So if Person A makes a change in their textarea, Person B will see that change automatically in their textarea. However, Person B's markdown area will not be updated right away. In fact, Person B's markdown area won't be updated until they make a change to their textarea themselves. This is a problem. We will solve this by making sure a change is reflected every second if the textarea has changed.


/* public/script.js */
window.onload = function() {
 var converter = new showdown.Converter();
 var pad = document.getElementById('pad');
 var markdownArea = document.getElementById('markdown');
 var previousMarkdownValue;
 var convertTextAreaToMarkdown = function(){
 var markdownText = pad.value;
 previousMarkdownValue = markdownText;
 html = converter.makeHtml(markdownText);
 markdownArea.innerHTML = html;
 };
 var didChangeOccur = function(){
 if(previousMarkdownValue != pad.value){
 return true;
 }
 return false;
 };
 setInterval(function(){
 if(didChangeOccur()){
 convertTextAreaToMarkdown();
 }
 }, 1000);
 pad.addEventListener('input', convertTextAreaToMarkdown);
 sharejs.open('home', 'text', function(error, doc) {
 doc.attach_textarea(pad);
 convertTextAreaToMarkdown();
 });
};


Multiple Markdown Files

Now we have an app where multiple people can edit the home page markdown file. However, what if we wanted to edit multiple markdown files. What if we wanted to go to the URL like http://localhost:3000/important_doc1 and collaborate with Bob and wanted to go to http://localhost:3000/important_doc2 and collaborate with Alice? How would we go about implementing this? First we want to add routes to match all wildcard routes in our server file.

/* server.js */
var express = require('express');
var app = express();
// set the view engine to ejs
app.set('view engine', 'ejs');
// public folder to store assets
app.use(express.static(__dirname + '/public'));
// routes for app
app.get('/', function(req, res) {
 res.render('pad');
});
app.get('/(:id)', function(req, res) {
 res.render('pad');
});
// get sharejs dependencies
var sharejs = require('share');
require('redis');
// options for sharejs 
var options = {
 db: {type: 'redis'},
};
// attach the express server to sharejs
sharejs.server.attach(app, options);
// listen on port 8000 (for localhost) or the port defined for heroku
var port = process.env.PORT || 8000;
app.listen(port);
On the frontend, instead of just connecting to "home", we want to use the correct sharejs room. Change "home" to document.location.pathname.

/* public/script.js */
sharejs.open(document.location.pathname, 'text', function(error, doc) {
 doc.attach_textarea(pad);
 convertTextAreaToMarkdown();
});

Clean Up

There are a couple issues that we need to address. One, it would be nice if the home page didn't just show random text that the last user entered. Let's disable the real-time markdown functionality for the home page.
/* public/script.js */
// ignore if on home page
if(document.location.pathname.length > 1){
 // implement share js
 var documentName = document.location.pathname.substring(1);
 sharejs.open(documentName, 'text', function(error, doc) {
 doc.attach_textarea(pad);
 convertTextAreaToMarkdown();
 });
}
convertTextAreaToMarkdown();
The last issue we need to resolve is forcing our tab button to act as we would expect a tab button to act in our textarea. Currently if we press the tab button in our textarea, it will make us lose focus. This is terrible. Let's add a function for our textarea that fixes this tab issue. Below is a copy of our final front-end javascript file.
/* public/script.js */
window.onload = function() {
 var converter = new showdown.Converter();
 var pad = document.getElementById('pad');
 var markdownArea = document.getElementById('markdown');
 // make the tab act like a tab
 pad.addEventListener('keydown',function(e) {
 if(e.keyCode === 9) { // tab was pressed
 // get caret position/selection
 var start = this.selectionStart;
 var end = this.selectionEnd;
 var target = e.target;
 var value = target.value;
 // set textarea value to: text before caret + tab + text after caret
 target.value = value.substring(0, start)
 + "\t"
 + value.substring(end);
 // put caret at right position again (add one for the tab)
 this.selectionStart = this.selectionEnd = start + 1;
 // prevent the focus lose
 e.preventDefault();
 }
 });
 var previousMarkdownValue;
 // convert text area to markdown html
 var convertTextAreaToMarkdown = function(){
 var markdownText = pad.value;
 previousMarkdownValue = markdownText;
 html = converter.makeHtml(markdownText);
 markdownArea.innerHTML = html;
 };
 var didChangeOccur = function(){
 if(previousMarkdownValue != pad.value){
 return true;
 }
 return false;
 };
 // check every second if the text area has changed
 setInterval(function(){
 if(didChangeOccur()){
 convertTextAreaToMarkdown();
 }
 }, 1000);
 // convert textarea on input change
 pad.addEventListener('input', convertTextAreaToMarkdown);
 // ignore if on home page
 if(document.location.pathname.length > 1){
 // implement share js
 var documentName = document.location.pathname.substring(1);
 sharejs.open(documentName, 'text', function(error, doc) {
 doc.attach_textarea(pad);
 convertTextAreaToMarkdown();
 });
 }
 // convert on page load
 convertTextAreaToMarkdown();
};

Push to Heroku

At this point, we have a fully functional realtime markdown editor. Now, how do we get it up and running on Heroku? First, we need to make sure we have an account with Heroku. Then we will need to install the Heroku toolbelt. In the command line, we will type heroku login to login to our heroku account. Heroku uses Git to push so we need to make sure we have created a repo and committed all our files to a local repo. To create a Heroku app, type heroku create from the command line. To use Heroku we will need to change how we configure Redis. We will using Redis to Go to add Redis to our Heroku app. From the command line type heroku addons:create redistogo. Also we will need to edit our server.js to handle this new configuration. Here is our final server.js file.

/* server.js */
var express = require('express');
var app = express();
// set the view engine to ejs
app.set('view engine', 'ejs');
// public folder to store assets
app.use(express.static(__dirname + '/public'));
// routes for app
app.get('/', function(req, res) {
 res.render('pad');
});
app.get('/(:id)', function(req, res) {
 res.render('pad');
});
// get sharejs dependencies
var sharejs = require('share');
// set up redis server
var redisClient;
console.log(process.env.REDISTOGO_URL);
if (process.env.REDISTOGO_URL) {
 var rtg = require("url").parse(process.env.REDISTOGO_URL);
 redisClient = require("redis").createClient(rtg.port, rtg.hostname);
 redisClient.auth(rtg.auth.split(":")[1]);
} else {
 redisClient = require("redis").createClient();
}
// options for sharejs 
var options = {
 db: {type: 'redis', client: redisClient}
};
// attach the express server to sharejs
sharejs.server.attach(app, options);
// listen on port 8000 (for localhost) or the port defined for heroku
var port = process.env.PORT || 8000;
app.listen(port);

Lastly we need to tell our Heroku app that we are using Node and tell it which file Node uses to start up. Add a file called Procfile in the root directory.

web: node server.js
Now after we commit our changes into Git, we are ready to push our app to Heroku. Type git push heroku master to push our repo to Heroku. We should see Heroku returning a bunch of statuses as it is building the application. Type heroku open to open the app! (Note — we can always end up renaming our app. At first Heroku will probably give us a ridiculous sounding name). The first time may take a bit to load but it should be all working. Remember go to something like our_application_url/document to edit a new markdown document.
Congratulations! We have a real-time markdown application that we can use for writing markdown and to collaborate with our friends.

Saturday, August 5, 2017

New Developer? You should’ve learned Git yesterday.

August 05, 2017 0
New Developer? You should’ve learned Git yesterday.
Source control is essential for any software project that has more than 3 files. Many new developers maybe not aware of source control or just ignore it at the beginning of their journey to become a great Software developer. A brief intro to what source control or version control is here. There are a lot of source control software CVS, Git, SVN, Mercurial and Bazar with centralized or distributed model. Git being a more popular version control software and Github is similar to Facebook for developers where social coding happens! So all new developers should learn Git and push code to GitHub every day. Knowledge of git provides an edge to any newbie developer and on of the desired skill in any software development company of any size. Check my other article on tips to become a better developer.


What is Git?

As I have mentioned earlier Git is a Version Control System (VCS). To explain on a very basic level, there are two awesome things a VCS helps you to do: You can track changes in your files, and it simplifies working on files and projects with multiple people which is known as distributed coding or social coding. There are multiple Version Control Systems, but Git is by far and large the most popular — both for individual and company use, yes git is been used by a lot of large tech companies ranging from Facebook to Uber .

On the other hand, GitHub is a web based Git repository. It provides a free and easy place to use Git, the cloud to store your code in, and it allows you to interact with other developers on Open Source projects.

Why use Git & GitHub?

Here are seven reasons you should be using Git and GitHub:

1. Centralized cloud storage of your code.

Your code is always available to you. No matter what computer your using, or where you are. Hard Drive failure? No problem. All your code is backed up in cloud you can just run a single command to copy them to any computer.

2. Version Control.

Every version of your code is also available to you. Git doesn’t work the same way as saving does in Microsoft Word. With Git, every time you commit your code, Git remembers what has changed since the last time you saved your code. Even if you’ve changed a file 1000 times, Git will remember each and every change. Need to revert back three months on a project for some reason? Git makes it easy and also saves you from the embarrassment when to delete you local copies or have added a feature which crashed whole application.


3. Working in teams.

Git simplifies the process of working with other people and makes it easy to collaborate on projects. Team members can work on files and easily merge their changes in with the master branch of the project. This allows multiple people to work on the same files at the same time. Git also allows you and your team to branch out from master where you can experiment with a new feature or new functionality to your application and if it works merge it to the master application branch.

4. Get involved / Open Source.

GitHub is a basic social networking site that makes it easy for even beginners to contribute to large projects and get involved in the open source community. You can meet other developers, ask questions about their code, and propose code changes. By using GitHub regularly you can learn how to work well in a development team environment.

5. Improving your code.

GitHub allows you to look back on code you wrote in the past. You’re able to look at projects from years ago and make them better, or just see how you’ve been progressing. This will boost your productivity and enhance your coding skills.

6. Show off

GitHub is a great way to get noticed — Show off your code and your projects! Especially if you’re a self taught developer, GitHub provides you a way to prove to recruiters and companies that you can program.

7. You’re gonna need it anyway

Companies and Technologies around the world use Git: Amazon, Facebook, LinkedIn, Yahoo, Microsoft, Netflix, Rails, Android, Linux and Zendesk — just to name a few. Learn Git and become more hire-able. (source)

How to learn Git

15 minutes is all it takes to learn the basics of Git. Here’s an awesome (free!) interactive tutorial sponsored by GitHub where you can learn all of the basics: try.github.io
GitHub also offers free training and additional learning resources in their documentation here.
Between those two links above, you should easily be able to learn and master the basics of GitHub in just a couple hours.

Closing Notes

Just learn Git. You won’t regret it. You’ll have the basics down in 15 minutes, and within a couple hours you can be making pull requests to open source projects. So keep coding and keep pushing code to your github repo!

Wednesday, August 2, 2017

7 Best Coding Playgrounds for Web Developers

August 02, 2017 0
7 Best Coding Playgrounds for Web Developers


Front-end code playgrounds

Over the years a variety of front-end coding playgrounds have appeared. The majority offer a quick and dirty way to experiment with client-side code and share with others. Typical features include:
  • color-coded HTML, CSS and JavaScript editors
  • a preview window — many update on the fly without a refresh
  • HTML pre-processors such as HAML
  • LESS, SASS and Stylus CSS pre-processing
  • inclusion of popular JavaScript libraries
  • developer consoles and code validation tools
  • sharing via a short URL
  • embedding demonstrations in other pages
  • code forking
  • zero cost (or payment for premium services only)
  • showing off your coding skills to the world!
The best feature: they allow you to test and keep experimental front-end code snippets without the rigmarole of creating files, firing up your IDE or setting up a local server. Here are seven of the best.
If, on the other hand, you’re curious about online code playgrounds that will let you share back-end code too, head over to James Hibbard’s A Round up of Online Code Playgrounds for more information.

JSFiddle

JSFiddleJSFiddle was one of the earliest code playgrounds and a major influence for all which followed. Despite the name, it can be used for any combination of HTML, CSS and JavaScript testing. It’s looking a little basic today, but still offers advanced functionality such as Ajax simulation.


CodePen

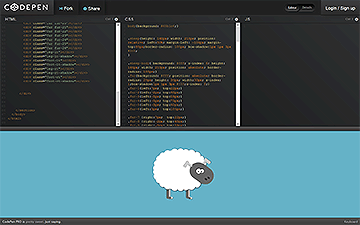
CodePenThe prize for the best-looking feature-packed playground goes to CodePen. The service highlights popular demonstrations (“Pens”) and Projects, which is an online Integrated Development Environment you can use to build and deploy web projects, a feature only added in March 2017. It offers advanced functionality such as sharing and embedding of Pens, adding external JS and CSS libraries, popular preprocessors, and tons more. The PRO service provides cross-browser testing, pair-programming and teaching options starting from just $9 per month.

CSS Deck

CSS DeckThis may be named CSS Deck, but it’s a fully-fledged HTML, CSS and JavaScript playground with social and collaboration features. It’s similar to CodePen (I don’t know who influenced who!) but you might prefer it.


JS Bin

JS Bin

JS Bin was started by JS guru Remy Sharp. It concentrates on the basics and handles them exceedingly well. it also offers a handy JavaScript console. Recommended.


Dabblet

DabbletAnother early playground, Dabblet started life as an HTML5/CSS3 demonstration system by Lea Verou with JavaScript facilities. It looks gorgeous and autoprefixes all your CSS if needed.

Plunker

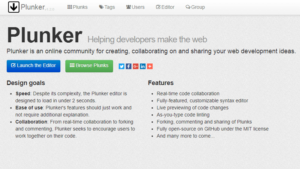
Fron-end Code Playgrounds: PlunkerPlunker lets you add multiple files, including community generated templates, to kick-start your project. Just like CodePen, with Plunker you can create working demos, also in collaboration with other devs, and share your work. Plunker’s source code is free and lives on its GitHub repository.

Liveweave

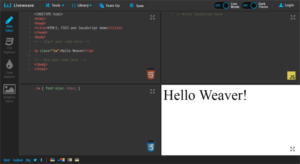
Liveweave Code PlaygroundLiveweave is one more online HTML5, CSS3 & JavaScript editor with live preview capabilities. It offers code-hinting for HTML5, CSS3, JavaScript and jQuery and lets you download your project as a zip file. You can also add external libraries such as jQuery, AndgularJS, Bootstrap etc. quite easily in your workspace. Furthermore, Liveweave offers a ruler to help you code responsive designs and a “Team Up” feature which has the same features as JSFiddle’s collaborative editing.
I guess I missed your favorite? Let me know in the comments!

Tuesday, August 1, 2017

9 Books To Boost Your Understanding of Technology & Systems

August 01, 2017 0
9 Books To Boost Your Understanding of Technology & Systems

9 Books To Boost Your Understanding of Technology & Systems


We’re hearing of Mark Zuckerberg’s possible interest in running for president. We refer to Elon by his first name. Bill Gates is the richest man in the world. And every college kid dreams of becoming a tech billionaire. There’s a certain ‘hollywoodization’ of entrepreneurship. Nowadays it’s also much easier to start a business. Throw up a website using one of the many templates out there, host it on Amazon Web Services or GoDaddy, find a pain you think exists and go about trying to solve it. In some cases, folk even try to raise money before the idea is fully fleshed out. It feels that easy. What this has led to is a false narrative about the required level of understanding of what you need to build business.
It’s the easiest time in the world to start a business but it’s also never been harder to build one.
I hear this gap in foundational understanding of business and technology in the many conversations I have with founders. While I recommend that actually doing the work of starting a business and screwing it up is the best way to learn, I also share the story of ‘the Elephant and the blind men
a group of blind men all touch an elephant to learn what it is like. Each one touches a different part and consequently think it is something other than an elephant.
and share the lesson that one cannot tell the whole from the parts; because you think you see a small part of a problem in an industry does not mean you understand how to solve the problem. Most entrepreneurs jump into solving a problem without truly understanding the whole picture or the ‘why’ of the problem.
To help these founders along, I recommend some books that provide a systems understanding of technology. Here are 9 books that’ll ramp you up quickly so that, when you do step out there to start your business, you understand the trends you’re riding, what part of the business cycle you’re in and what foundational systems/models you’re going up against.
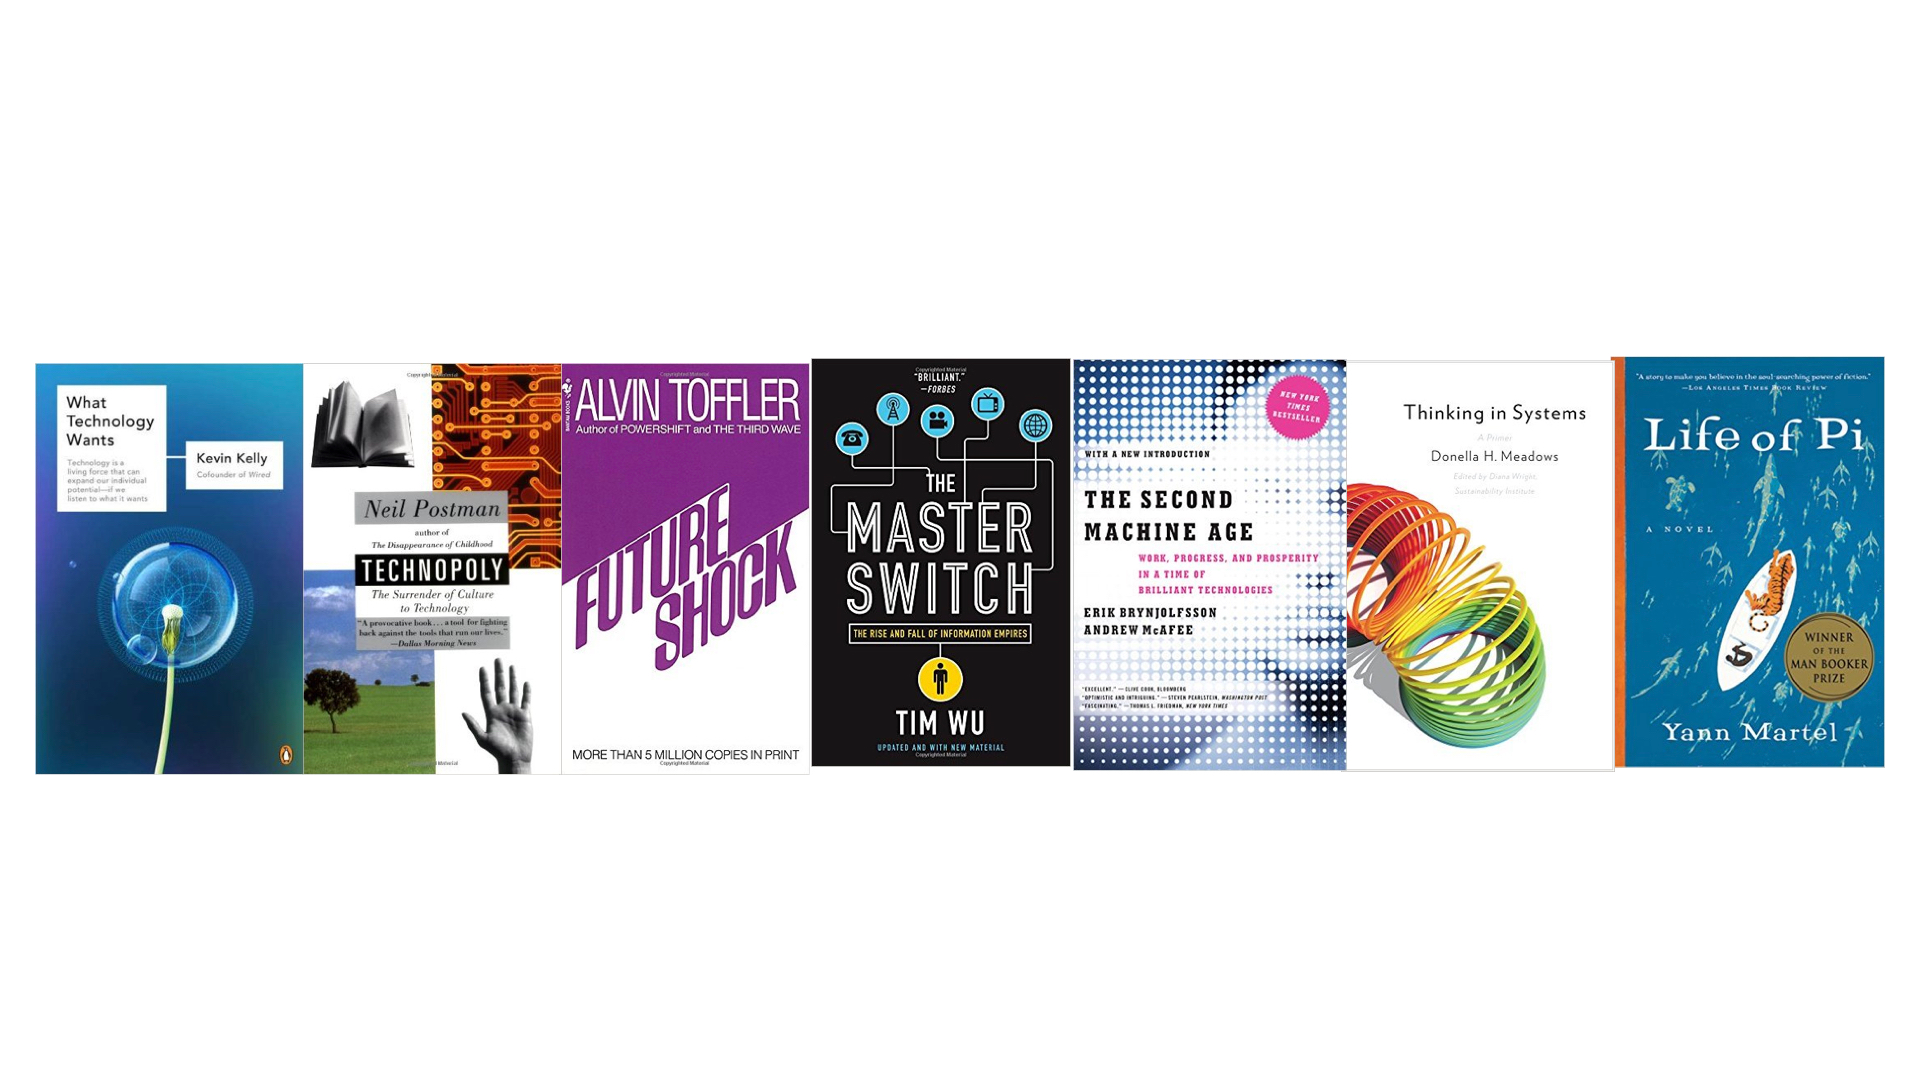
  1. What Technology Wants by Kevin Kelly. A good friend and fellow utility tech enthusiast friend (Eugene Granovsky) clued me into this book. Kevin Kelly would be considered the opposite of Neil Postman (below), as he is one of the foremost proponents of the value we can gain from the technological changes that are inevitable in our lives. He share more of these expectations he has of the technological systems changes around us in his newest book ‘The Inevitable. We’re already seeing the HOLOS = Tech/The Machine + 7 Billion Souls, a force he expounds upon, at play around us.

  2. Thinking In Systems: A Primer by Donella Meadow. The story of the elephant and the blind me above is also included in this, a personal favorite, book in explaining the need to understand systems as a whole. A holistic understanding of systems and the models that operate within these systems at all times is necessary before any disruption can happen. As I like to say, and unfortunately I cannot remember where or from whom I first heard this quote ‘to disrupt a thing, you have to truly understand it’.
  3. The Second Machine Age by Erik Brynjolfsson, Andrew McAfee: The current backlash against Artificial Intelligence and Robots etc. is nothing new. This book focuses on the impact of exponential and combinatorial technological change on human work. Read this as much for the message (we need to proactively do something to push back the worsening conditions of income disparity brought on by technology) as for the study of the systems that are impacted by game changing technological advances like AI and Machine Learning.
  4. The Master Switch by Tim Wu: I’m a big Tim Wu fan. In this book, he discusses the impact of technology (and the information flow that our technology makes possible) on the TV, movie and internet industries. The book is as much a journey through the life of these industries as it is a description of the cycles that technology goes through as they become ubiquitous; all useful technology is innovative until it becomes commonplace. Pair the book with his new one ‘The Attention Merchants’ to learn more about how we got to this point in the life of the internet.
  5. Future Shock by Alvin Toffler: I am currently reading this book again and amongst the many quotes that one can pull from this prescient book, one that speaks to the now of communication technology is ‘…but in almost every other communications medium we can trace a decreasing reliance on mass audiences. Everywhere the ‘market segmentation, process is at work’. Another one that is closely related to the premise of The Second Machine Age (above) in the age of AI is ‘there are discoverable limits to the amount of change that the human can absorb, and that by endlessly accelerating change without first determining these limits, we may submit masses of (hu)mans to demands they simply cannot tolerate’. While some of his context might be outdated, the book was written in 1970, the overarching musings (the accelerating pace of change and of information overload) still hold true today. Probably more so.
  6. Technopoly by Neil Postman: The copy of this book I read is actually my wife’s copy from her undergraduate degree days. Apparently, in her major at Stanford, she had to read this and share her views on the perspectives provided by Neil Postman in this book that is very relevant to the current landscape of technology. It’s the most marked book I’ve ever read (she’s studious like that) but that element of it, someone else’s notes, makes it a fantastic read of a great book that focuses on the inequalities that technology brings to society.
  7. The Life of Pi by Yann Martel: This might seem like an odd one to include on here until you read why. I was having a conversation with Jeremy Adelman about this blog post and... you know what, I’ll let him explain more eloquently than I could why this book helps you understand technology (hint: because it helps us understand our biases and we all know our biases seep into the products we build); “few books force you to confront who you are and your perception of situations and trends. We all have filters and lenses through which we perceive the world and our interpretation of our present and future is wholly through these lenses. This is a critical realization if you want to look at technology trends and build a product that is both on trend and lasting in its ability to solve human pains. Life Of Pi truly makes us think about these lenses and biases.
Which books would you add to the list? Let me know in the comments.

Monday, July 31, 2017

How to choose the best laptop for your programming journey

July 31, 2017 0
How to choose the best laptop for your programming journey
Choosing the right gears of war (laptop in this case ;) ) for programming can be a tough choice to make.
It’s easy to get confused while researching the various options. There are many different laptop models out there from renowned brands like Apple, Dell, HP, Lenovo, Samsung are the few to name of, each models with multiple set of variants and different set of trade-offs.
You can write code on most laptops irrespective of the price or ultra cool features (like keyboard backlight, NVMe SSD, GTX 1080 etc.) . Yet, your productivity will improve if you use a machine suited to the type of tasks that you perform.
There are different types of development, and various tools are required with each specialization. So, there is no one-size-fits-all approach to buying a development machine.
When I wrote this I made the following assumptions in this article:
  • You are a web developer
  • Your laptop is your primary development machine
Here are some considerations before purchasing your next laptop.

Mobility

Laptops come in all shapes and sizes, ultra portables to bulkier ones. You need to decide how portable you want your laptop to be. If you do not need to carry your laptop around often, you might want to consider a 15-inch laptop. These will usually have better specs and more screen estate for multitasking. If you work in different locations or travel a lot, a 13 or 14-inch laptop may be best for you. They are lighter and provide longer battery life, which is extremely important because you may not always have the access to the power outlet to charge up your laptop so the extra juice goes a long way. Unless you’re buying a 2-in-1 laptop, a touchscreen does not provide enough benefits to justify the extra cost. I’d suggest you avoid the touchscreen, but it's an excellent option for designers and creative developers on the front end area of expertise.

Ultra Portable Laptops


Display

A laptop’s screen one of its most important features, especially for programmers. Developing applications involves staring at the screen for long periods, this might sore our eyes but who cares anyway (on a serious note please don't take eye problems lightly, take some break during your long coding jams to give your eyes some rest)! You need to pay close attention to the details. Most budget laptops ship with a 1366 x 768 display, which I consider to be mediocre at best. The display doesn’t have enough screen estate for multitasking. Also, the text isn’t sharp enough for you to have a comfortable reading experience, even with clear text. A 4k display is overkill for a laptop but a viable choice if you have the extra bucks lying around to spend, although the overall battery life might suffer a little for this fancy add on. Whatever you do, try to buy a laptop with at least Full HD 1920 x 1080 (1080p) display. If you have to pay a little extra to get 1080p, spend it, this will add immense value to your productivity in the long run. Also make sure the display has good viewing angles; your laptop’s screen should not double as a mirror!

Processing Power (CPU)

Your laptop’s CPU is the heart of the system and has a huge influence on performance so you can’t afford to skimp on this one. There are many different types of processors with different specifications with variety of generations and multiple cores and threads. Please take this facts into your consideration of these specs of the CPU. Some of the most important are cache size, number of cores, frequency, and thermal design power. In general, a nice Intel core i5 or i7 processor with a frequency of 3GHz or more should suffice for most people.

Memory (RAM)

I don’t think any serious programming can be done on a laptop with less than 4GB of RAM. My smallest RAM recommendation is 8GB, because you know Google chrome!

Even that is becoming barely enough with the advent of Electron apps, which love to consume large amounts of RAM as it's literally a portable standalone version of the whole Chrome application. If you have extra cash lying around, invest that into 16GB of RAM.

Storage type and capacity

Getting an SSD (Solid State Drive) should be near the top of your priorities, as this gives you less headache while loading large applications. This will give you significant performance improvements over a standard hard drive. Every operation will be a lot faster with an SSD: including booting up the OS, compiling code, launching apps, and loading projects. A 256GB SSD should be the baseline. If you have more money, a 512GB or 1TB SSD is better. If cost is a factor, opt for a smaller SSD usually 128GB, where your Operating System will live alongside your apps and frequently accessed documents (such as project files). Your remaining stuff, such as music or videos, can rest in a larger internal 1TB hard drive or you can opt for an External USB hard drives, but make sure it's USB 3.0 or else the data transfer speed will be significantly slower.

Keyboard


You can’t afford to compromise on your laptop’s keyboard quality since it is what you’ll use to bang out code all day. I tend to go for laptops with a more compact keyboard layout.
The most important thing is to try out a laptop’s keyboard thoroughly before you buy. Make sure the keys are comfortable and easy to reach with good travel. A back-lit keyboard is useful if you intend to work in low-light conditions often.


Juice

Good battery life may not be all that important to you if you spend most of your time near a power outlet probably in your office but if you need to travel a lot this is going to be very crucial as the extra juice will save you a lot of trouble and you can focus more on coding than searching for the power outlet. Go for at least 6 hours of battery life. Don’t rely on the expected battery life as stated by the manufacturer as those are tested in environments with unrealistic conditions which are not even close to day to day real life usage. Read third-party appraisals from reliable websites, and see what real users are saying about the product in forums and reviews.

Operating System

Your choice of operating system will determine which laptop to buy to a large extent. Windows users have lots of options but if you prefer macOS, you’re limited to one of the Macbook offerings.
 

Linux will run on most hardware but it is better to buy laptops which have official Linux support. Some vendors, such as Dell and System 76, provide top quality machines with Linux pre-installed. You might want to look into those first. Otherwise, do your research to make sure the laptop you intend to buy plays well with your preferred Linux distributions. If it does not support Linux right away don't get disheartened you will always have the option for VMware or Vagrant based software solutions to emulate the environment.

Dedicated or Integrated Graphics?

A dedicated (also known as discrete) graphics card isn’t very important for coding purposes. Save money by going with an integrated graphics card unless you are into machine learning or AI which requires you to run tensorflow or keras then a discrete GPU is a decent investment as that will reduce your execution time for sampling and training models. If machine learning is not area of your interest then feel free to invest the money you save in an SSD or a better processor which will provide more value for the money. I’d love to know what factors you consider to be most important for a development machine and how it affects your work on a day to day basis, let me know in the comments below.